Teach Your Little Galactic Explorers About Space With These Fun Science Activities You Can Do at Home
To some degree, all children are natural-born scientists! Even as newborns, every day brings new opportunities to discover, explore, and learn about this big world we are a part of.
Over time, as children’s observation skills develop, they begin to recognize patterns, and once they spot a pattern, they will likely see them everywhere. For instance, recognizing that the sun sets and rises every day is just one of the many ways little learners utilize their natural observation skills to find patterns!
When children start to recognize the Sun, the Moon, and the stars in the night sky, this is a great opportunity to begin fostering excitement around space and science. Nothing ignites curiosity or sparks the imaginations of young children quite like learning about the wonders of space.
With engaging, hands-on science activities, children of all ages can develop a better understanding of the universe around them and a love for learning – through play!
5 Space Science Activities for Kids with Step by Step Instructions!
These easy and fun space-themed activities are a great opportunity to introduce kids of any age and learning level to scientific concepts and phenomena. Read on to learn how you can use common household items to create fun space activities for kids!
This fizz rocket activity is an exciting way to demonstrate Newton’s third law of motion: “For every action, there is an equal and opposite reaction!” And boy, oh boy, was Newton right!
Grab some goggles, head outside, and count down to blast off with this fun at-home rocket launch science experiment!
Watch the Tutorial!
Supplies:
- Safety Goggles
- Empty Photo Film Canisters
- Baking Soda
- White Vinegar
- Water
- Pipette
- Empty Paper Towel Tube (This is optional)
How to Launch Your Fizz Rockets:
- Put on your safety goggles and head outside! (Always do this experiment outdoors.)
- Remove the lid of your film canister and set it aside for the time being.
- Using your pipette, fill your film canister with white vinegar about a quarter of the way up/ less than halfway. Then set it aside while you make your rocket fuel.
- Make your rocket fuel by mixing a little bit of water with some baking soda until it is a thick paste.
- Place a small dollop of your rocket fuel on the inside of the film canister lid.
- Wipe off any baking soda fuel residue from the outside of the film canister lid. (Baking soda on the outside of the canister may cause the rocket to not launch.)
- Next, secure the lid onto your film canister, being extra careful not to let the vinegar touch the baking soda until you are ready to launch.
- Once the lid is secure, place your rocket lid-side down on a flat and even surface and quickly take 2 – 3 steps backward. (If you have an empty paper towel roll, you can place it over the canister before stepping back and it will act as a launch tube, but it is not required.)
- Start your countdown and watch your rocket blast off!
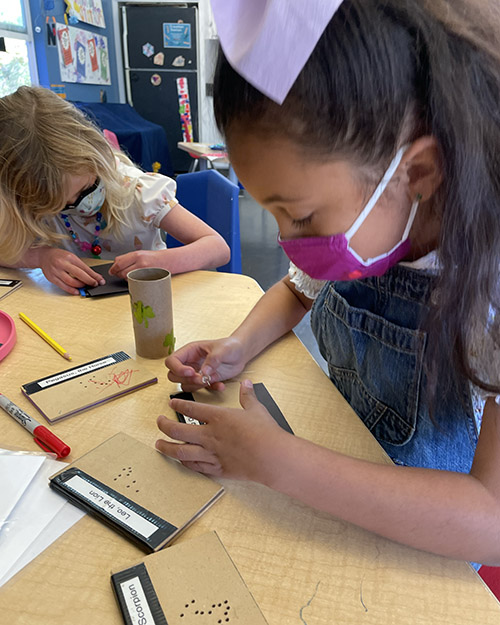
On a clear dark night, we can easily see over 1,500 stars in the sky! So to help us know which stars are which, we have constellations! Star constellations help break up clusters of stars to make identifying specific stars easier.
Constellation telescopes are a creative and fun way to help little astronomers learn about all the visible stars we can see in the night sky from Earth. The best part is, kids can use their constellation telescopes during the daytime too!
Supplies:
- Scissors
- A Glue Stick
- A Thumb Tack
- White Paper (to print your star cards)
- Black Paper
- Rubber Bands
- An Empty Toilet Paper Tube
- Star Constellation Cards (Download Here)
How to Make Your Constellation Telescope:
- Cut out your star constellation cards and glue each one onto a black piece of paper.
- Once dry, use a thumbtack to poke holes through each star dot. Hold it up to the light to make sure each hole has been poked through all the way.
- Choose a star constellation and place it over the top of your empty TP roll.
- Keeping your constellation centered over the opening, fold the black paper down around the TP roll and secure it in place with a rubber band.
- Hold your telescope up to a light source and look through to see your constellation!
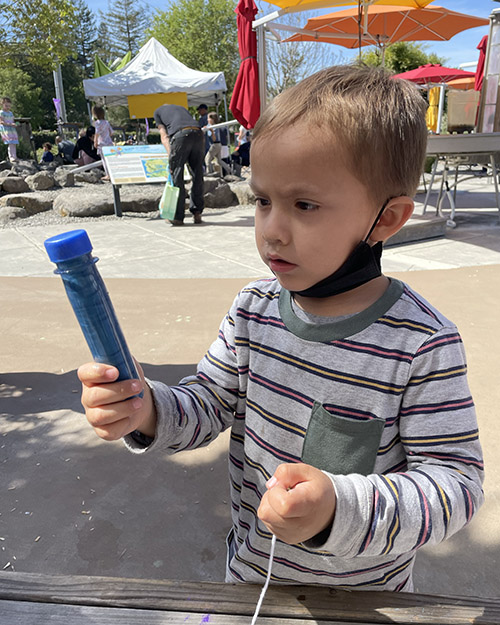
These Glittery Galaxy Bottles are not only a great calm down helper, but they are also an up-close look at Rheoscopic Fluid and how currents move through water!
Supplies:
- Clear bottles with tight-fitting lids (Old disposable water bottles work great!)
- Sparkly/glittery eyeshadow (Broken up into a powder)
- Water
How to Make Galaxy Bottles:
- Remove any labels from the outside of the bottles.
- Fill each bottle with water.
- Add about 1 tsp of glitter eyeshadow to each water-filled bottle. (For extra sparkle add more eyeshadow!)
- Tightly cap the bottle and shake it up.
- Watch the galaxy swirl around in your hands!
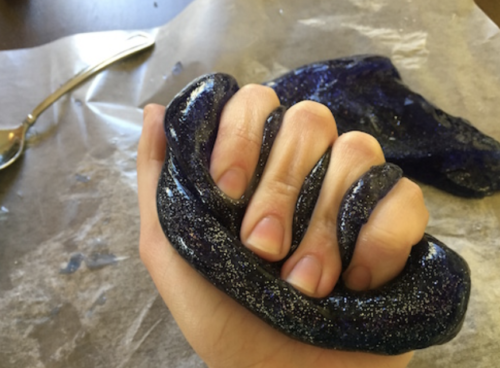
Did you know our universe is stretching and expanding? For over 100 years now, scientists from around the world have been observing the ‘expansion of the universe’ concluding that galaxies are in fact moving farther and farther away from us!
With this Galaxy Slime space-themed activity for kids, future scientists can create their very own handheld galaxy to stretch and squeeze!
Supplies:
- Non-Toxic Clear Glue
- Borax (1 tsp.) – follow all warning labels and directions on the box
- Water
- Red and Blue Food Coloring
- Two Mixing Bowls (use glass or disposable if you’re worried about staining)
- Measuring Cups: 1/2 cup and 1 cup
- Silver Glitter
- Wax paper
How to Make Galaxy Slime:
- In one of the bowls, mix 1/2 cup of glue with 1/2 cup of water.
- Add 6 drops of blue and 3 drops of red food coloring to your mixture. It should be a deep shade of purple. (White glue will make this appear more opaque.)
- In your second bowl, have an adult mix the 1 tsp. of borax with 1 cup of lukewarm water, and stir continuously until the borax is completely dissolved. (Make sure all the borax is completely dissolved before moving on, or your slime will not form correctly.)
- Once fully dissolved, slowly stir your purple glue mixture into your borax water.
- Your slime will begin to form as your stir but keep mixing until it is congealed enough to pick up out of the bowl. (It is safe to use your hands to mix.)
- Once your slime is sturdy enough to pick up, place it on a piece of wax paper. Some liquid may remain in the bowl after you remove the slime, that is normal.
- Squish your slime flat onto the wax paper and sprinkle your silver glitter all over the top of it. (You can use any color glitter but silver and lighter tones stand out best against the dark purple slime.)
- Fold your slime in half with the glitter on the inside, and continue to knead and fold it on the wax paper for a minute or two. Once the glitter is fully incorporated, your galaxy slime is complete!
- Stretch, squeeze, and mold your own handheld galaxy!
This at-home space activity perfect for kids comes to us from the professionals at NASA’s Jet Propulsion Laboratory (JPL)! JPL is currently the world’s leading center for space science and exploration, whose spacecrafts have flown to every planet – even the Sun!
Straw Rockets are an excellent opportunity for little learners to gain first-hand experience designing and engineering something for fun! After you have created your first straw rocket you can conduct your own at-home experiments to see how small modifications to the design can change how far your rocket can fly.
Supplies:
- A Pencil
- 2 Pieces of Paper
- Scissors
- Scotch Tape
- A Straw (Reusable works best)
Rocket Body
- Trace the outline of your straw on one of your sheets of paper.
- Draw a rectangle around the outline, wide enough to wrap all the way around the straw length-wise.
- Cut out your rectangle.
- Wrap the rectangle length-wise around your straw to form a tube and tape it closed. The tube should be loose enough to slide off the straw easily, but there should be no large gaps between the paper and your straw.
- Once your tube is securely tapped, remove it from your straw and place it on your pencil. Twist and pinch one end of the tube around the tip of the pencil to create a closed cone shape. This will be the nose of your rocket.
- Tape the nose to keep it from untwisting and prevent air from escaping.
Rocket Fins
- Fold your second piece of paper in half hamburger style. (Shorter side to shorter side.)
- About a half-inch up from the folded edge, draw a 3 – 4 inch wide triangle.
- From the bottom of the triangle draw two lines down to the folded edge of the paper. (About a half-inch apart from each other) Your triangle should now look like a tree.
- Keeping your paper folded, cut out your tree shape, and then cut the folded edge to create two identical trees.
Attaching the Fins
- Take one of the tree shape and align the bottom of the ‘trunk’ with the bottom of your rocket body, and tape the top of the triangle and the ‘trunk’ to the body of your rocket. (No part of the fins should stick out past the bottom of your rocket body.)
- Repeat this with your other tree shape on the opposite side.
- Once they are securely taped in place, bend one side of each fin at a 90-degree right angle. From the bottom looking up, the fins should create a + shape.
Launch Your Straw Rocket
- Once your fins are in place your rocket is ready to launch!
- Put your rocket onto your straw and see how far you can blow your rocket across the room!
Visit Our Space Odyssey for Galactic Explorers Exhibit to Experience the WONDERS of the Universe Up Close!
All of our exhibits are designed to provide visitors of all ages, abilities, and stages of learning a hands-on way to learn about the world around them through fun and engaging play. For the first time ever at the Children’s Museum of Sonoma County, our new Space Odyssey for Galactic Explorers exhibit allows you to experience the WONDERS of our universe up close!
We are excited to welcome you aboard, and invite you to join us at the Children’s Museum of Sonoma County to explore our new Space Odyssey Galactic Explorers Exhibit! Our newest exhibit is bursting with space-themed activities for kids of any age to encourage a lifelong love of learning.